Ever get drape envy from a perfectly-dressed window you spot in a magazine or on a Pinterest board? Designers and TV hosts make it look so easy to buy a few yards of fabric and turn $7 into elegant draperies in 40 minutes flat. But when you try it, the end result is rarely as spectacular, and never as cheap as the professionals make it look.
Estimated reading time: 10 minutes
If you’ve ever sat and wondered how it’s possible that that tie-dyed tapestry you had hanging in your dorm room window was a better look than your current curtain situation, you’re not alone. Hanging drapes isn’t exactly rocket science, but it’s not for the faint of heart, either. A well-hung window treatment can completely transform a room, and a poorly-hung treatment can completely ruin one.
Here are seven obstacles to hanging drapes that might be standing in the way of you and the best-looking, most grown-up draperies you’ve ever seen.
Table of Contents
- Problem #1: The process of hanging drapes is overwhelming
- Problem #2: Most people don’t know the difference between drapes and curtains
- Problem #3: Everything you need to hang drapes DOESN’T actually come in the box
- Problem #4: You really didn’t think you could eyeball it, did you?
- Problem #5: You don’t know how big the curtains should be
- Problem #6: Getting the wrong rod for drapes or curtains
- Problem #7: Not using the correct tools
- Useful reminders when buying drapes and curtains
- Where to buy window treatments?
Problem #1: The process of hanging drapes is overwhelming
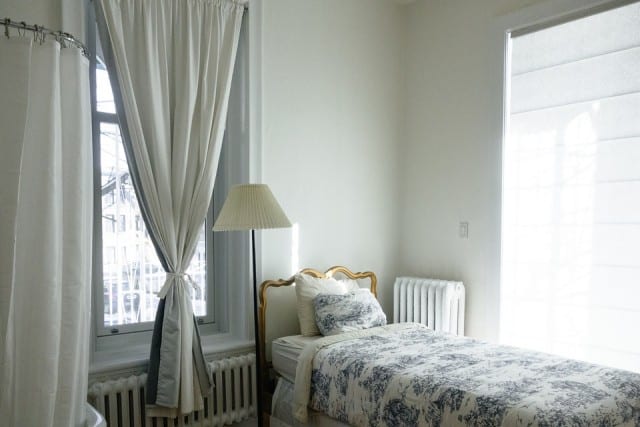
Even if you’re a professional homemaker, that doesn’t mean you have a background in design, aesthetics, or carpentry — all of which play a role in how well these kinds of projects turn out. Sure, most curtain rods come with installation instructions, but even if you take time to read them (and let’s be honest, most of us don’t), those instructions are often too vague. They tell you how to attach the hardware to the wall, but they don’t provide any quality tips on how to get the look you’re trying to achieve.
Most people get things done through trial and error, and while that works for many things, window treatments are one project that will look horrible if done incorrectly. no shortcuts to the correct way to hang drapes, and as it turns out, there really are some rules that you should follow if you want to do it yourself and get the most style and bang out of your budget. It’s not just you!
Problem #2: Most people don’t know the difference between drapes and curtains.

It is always important to get acquainted with the proper terminology when you’re venturing into any unfamiliar territory, especially if you want to ask the right questions when you’re at the store. Doing a little preparatory work with the vocabulary can make your experience a whole lot easier. Here are some of the essential terms:
- Drapes are lined curtain panels. They should be hung in pairs. They are much heavier than curtains, and they can also have thermal and/or room-darkening features. Thermal drapes are great for energy conservation. They keep the weather outside where it belongs until you want to let it in.
- Curtains and sheers also come in panels, but they are built from lightweight fabrics, and will not filter out all of the light to darken a room. They can be hung in layers with drapes so that you can pull back the drapes to let in the light, but still have privacy.
- Blinds are single panels that are made to fit the exact size of the window inside its frame. They do not fall below the window sill. They are made of wood, metal, vinyl, or other non-woven materials that tilt open and closed. They are similar to shades but are made of wood, metal, or vinyl, or other non-woven material that tilt open and closed. Blinds can have vertical or horizontal louvers, depending on the style.
- Shades are similar to blinds, but they do not have louvers. They open in one of the following ways: roll around a rod, gather into pleats or puffs or tie-up.
I learned the hard way that not knowing the difference between window treatments can cost you a pretty penny. The house I grew up in had the thickest goldenrod woven drapes you can imagine. We had ivory sheers layered inside the drapes, and I can remember my grandmother cleaning the drapes routinely, twice per year in the spring and fall. Taking them off their hooks, washing them and hanging them up in the sun to dry was a big deal, and I hated those stupid drapes. I thought they were ugly, so when I inherited the house, the first thing I did was take them down. I thought I wanted to let the light in.
By the time I got the first electric bill that winter, it was too late. I’d replaced them with some better-looking hand-me-down curtains that didn’t have that thermal, room-darkening lining. I immediately regretted throwing those old drapes away instead of just storing them in a closet somewhere, because when I checked into the cost of buying new thermal drapes, I realized I didn’t have the budget for it.
A few months later, I found a sale and spent $68 on four new sets of drapes. I thought I’d gotten a great deal, but then I realized the rods I already had were for drapery hooks, not grommets like my new curtains had. Another month later, I snagged four sets of double round rods at Target for under $100. So while it’s possible to get rods and energy-saving, room-darkening drapes for four windows for under $200, it’s going to take a while if you’re on a budget.
Problem #3: Everything you need to hang drapes DOESN’T actually come in the box

Unfortunately, when it’s time to buy new drapes, you can’t just go pick out a couple of drapes and a rod and be done. You have to gather up some tools and take your time: plan out what you want, and maybe even print out an inspiration photo or two! Think about how many windows you have in the room, and whether you want to be able to make it dark on a bright day, or whether you need some extra protection from the heat or cold. At a minimum, you need a measuring tape, a hammer or screwdriver, nails or screws, and a pencil. You might also need a friend and a step stool.
Problem #4: You really didn’t think you could eyeball it, did you?

Some perfectionist grandmother, aunt, mom, shop, or home economics teacher somewhere in your past has warned you: “Measure twice, cut once.” Listen to their advice! Measure every window. They might look the same, but not all floors are level, especially in older homes that have “character.”
You might be surprised to find that your windows are up to an inch or two higher or lower from the floor on different walls. So get out that measuring tape (the metal one from your toolbox, not the one in your sewing basket). Measure each window from the outside of the bottom trim to the outside edge of the top trim. Then, measure from the outside edge of the left trim to the outside edge of the right trim. That will give you your window dimension on the outside of the window frame.
If you’re in the mood for blinds or shades, measure the window itself, top to bottom and left to right inside the frame. Finally, measure from the top edge of the trim to the floor. Consider whether you have heating vents or radiators or deep window sills to work around. Also consider that the “floor” could be a countertop if you are measuring for a window that is above a sink or in an awkward place. Make sure you write down all of your measurements along with which windows they describe.
Problem #5: You don’t know how big the curtains should be.

Once you have your measurements, you can calculate the size of your curtain. The easiest method to establish the width is to follow this equation: Width of window (with trim included) x2.
That gives you the minimum width you need to have a nice, full curtain or drape when you have them pulled shut. However, they need to be long enough, too. A too-short curtain can ruin the whole project. If they’re too long, you can fix them, but if they’re too short, there isn’t really anything you can do. A too-short curtain panel is like being six feet tall wearing a pair of pants made for someone who’s petite. Everybody will notice. They may not say anything, and they may not even know why your window looks awkward, but they’ll notice that there is something a little off.
For length, you want your curtains to barely touch the floor, window sill, countertop, or whatever established baseline you have chosen. The length is going to be based on the top of window trim to floor measurement. Add six inches, and purchase panels that are at least that long. You can hem longer curtain panels to work with a sewing machine or hem tape, but you can’t make a too-short curtain longer, and it’s really expensive to start over if you cut and hem your drapes too short.
As a side note, sometimes it is fine to go too long on purpose. If you want that romantic, airy, fairy tale look, you can definitely puddle those curtains beneath the windows to create drama. However, you have to find the right fabric for that. Think Dupioni silk or something heavy and luxurious that will drape in just the right way. You can’t really achieve that look with stiff, coarse fabrics, and that kind of thing is hard to accomplish without a sewing machine or a friend with a sewing machine, but it is possible to achieve if you really want to do it.
Problem #6: Getting the wrong rod for drapes or curtains

Your curtain rod should be no more than 1.3x the width of the window, but you want enough width so that when you pull the curtains back, they reveal almost the full window. Take the left trim to right trim measurement and multiply by 1.3 to get your ideal width, and buy the shortest curtain rod that adjusts to that length. Shorter rods are less expensive, and there is usually some overlap, so don’t waste your money buying one that extends longer than you need if the shorter one will do.
You also want to consider the weight of the curtain. If you buy lightweight curtains, a slim rod will work, but if you buy a heavier drape, you need to choose something more sturdy. Most drapes can be hung on a regular round rod, but if you choose a drape that requires drapery hooks, make sure you purchase the correct type. Rods also come as single rods or as doubles for hanging drapes with sheers behind them. If you don’t plan on hanging sheers, don’t waste money buying the double rod setup unless you want the option to hang sheers in the future. Your options are endless.
Problem #7: Not using the correct tools

Now is the time to think about how the drapes or curtains actually hang, with grommets, rings, hooks, tabs, and rod pockets. Using these things correctly will make a difference in how high above the window your curtain rod sits in order to achieve the best look.
Generally, you want to hang the rod above the frame, a little wider than the frame. It should either sit halfway between the top of the window and the bottom of the ceiling or crown moulding, or it should sit between four and six inches above the window frame. Regardless of the height of the ceiling, it shouldn’t sit more than eight inches above the frame. You never want to hang the rod directly on the window frame!
Always start with the bottom. You do not want more than half an inch between the bottom of the curtain and the floor or baseline. You want there to be an illusion. You want people to think that the curtain might actually be touching the floor.
Keep in mind that the dramatic look you love in the magazines is also often an illusion. The higher you hang the rod, the taller the window looks. Taller windows make the ceiling look higher. So assemble your rod, put a curtain panel on it, and lay it out on the floor. Then, measure from the bottom of the curtain panel to the point where the nails and screws go into the wall for the rod.
After you have this measurement, add one-half inch, and mark your wall on both sides of the window frame at the distance on each side where the rod will attach. Then you can use the same measurement to mark all the remaining walls. After that, you can install the rods and hang the curtains in their perfectly-measured new homes. Note that if your curtains are too long, resulting in installing the rods more than eight inches above the window frame, now is the time to hem them.
Make no assumptions. There is no standard or normal window!
Useful reminders on how to buy drapes
The biggest questions we see when we post deals on drapes are about which length is best, are the drapes a single panel or a pair, and questions about caring for drapes.
Drape length
When you go out shopping you are going to see a lot of 84″ curtains. As a rule, if the tops of your windows are in the 6′ – 7′ range, you want 84″ curtains, but everyone else should buy some hem tape or use a sewing machine and hem the 96″ (or longer) curtains to the desired length.
Drape Panels vs. Pairs
Watch and see if the curtains you want are sold by the panel or by the pair. You need two panels for each window. Sometimes images will show the drapes in pairs, but then only sell the single panels, so do your research before hitting the Checkout button.
Removing wrinkles and creases
Don’t forget to steam new window treatments or shove them in the dryer a few minutes if the fabric can be put in the dryer in order to de-wrinkle.
Where to buy window treatments?

Below are some of our favorite places to find the best deals on drapes.
Target
JCPenney
Hayneedle
Wayfair
Overstock
Have any of your own tips for creating a picture-perfect window treatment? Leave ’em in the comments!


